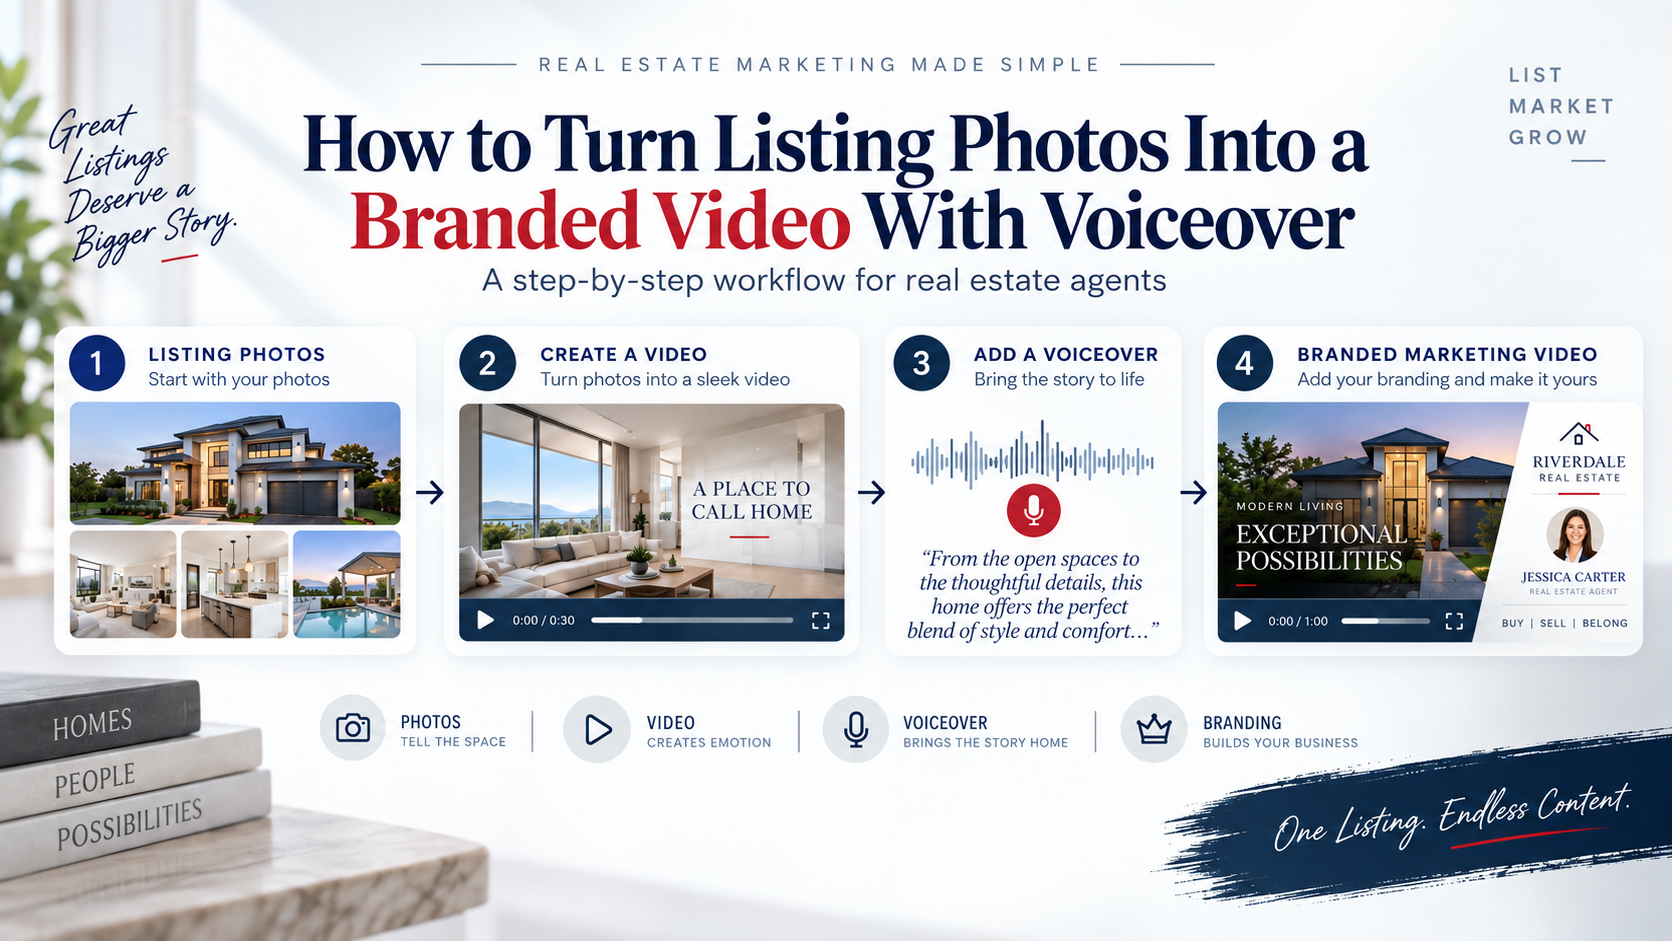
How to Turn Listing Photos Into a Branded Real Estate Video With Voiceover
You already have the listing photos.
That means you already have the raw material for a professional property video, a narrated social post, and a branded piece of marketing content.
You do not necessarily need to schedule another property visit or start an entirely new production from scratch.
The workflow is straightforward:
Listing Photos → Listing Video → Voiceover → Agent Branding → Social Distribution
In this guide, we'll walk through the entire process using three Real Estate Photo 2 Video tools:
The idea is simple: create one strong piece of content, improve it in stages, and then use it across more of your real estate marketing.
If you haven't already, you may also want to read our guide to getting more marketing value from your listing photos. This workflow is a perfect example of that strategy in action.
Why Turn Listing Photos Into a Branded Real Estate Video?
Professional photography is still one of the foundations of a good listing.
But photos and video do different jobs.
Photos let buyers study the property. Video creates movement, pacing, and a stronger sense of progression through the home.
Then voiceover adds context.
Branding connects the finished marketing back to the agent.
Put those elements together and a standard listing photo set becomes a completely different marketing asset.
A branded property video can be used for:
- Facebook Reels
- Instagram Reels
- YouTube Shorts
- TikTok
- Stories
- your website
- property pages
- email marketing
- listing presentations
- seller updates
- buyer follow-up
- social posts announcing a new listing
- open-house promotion
- price-change or relaunch marketing
There is another important benefit: every professionally marketed listing is also a demonstration of how you market homes.
Someone watching your video may not be interested in that particular house.
They may, however, be thinking about selling their own.
A polished branded video quietly answers a question future sellers often have:
"What would this agent do to market my property?"
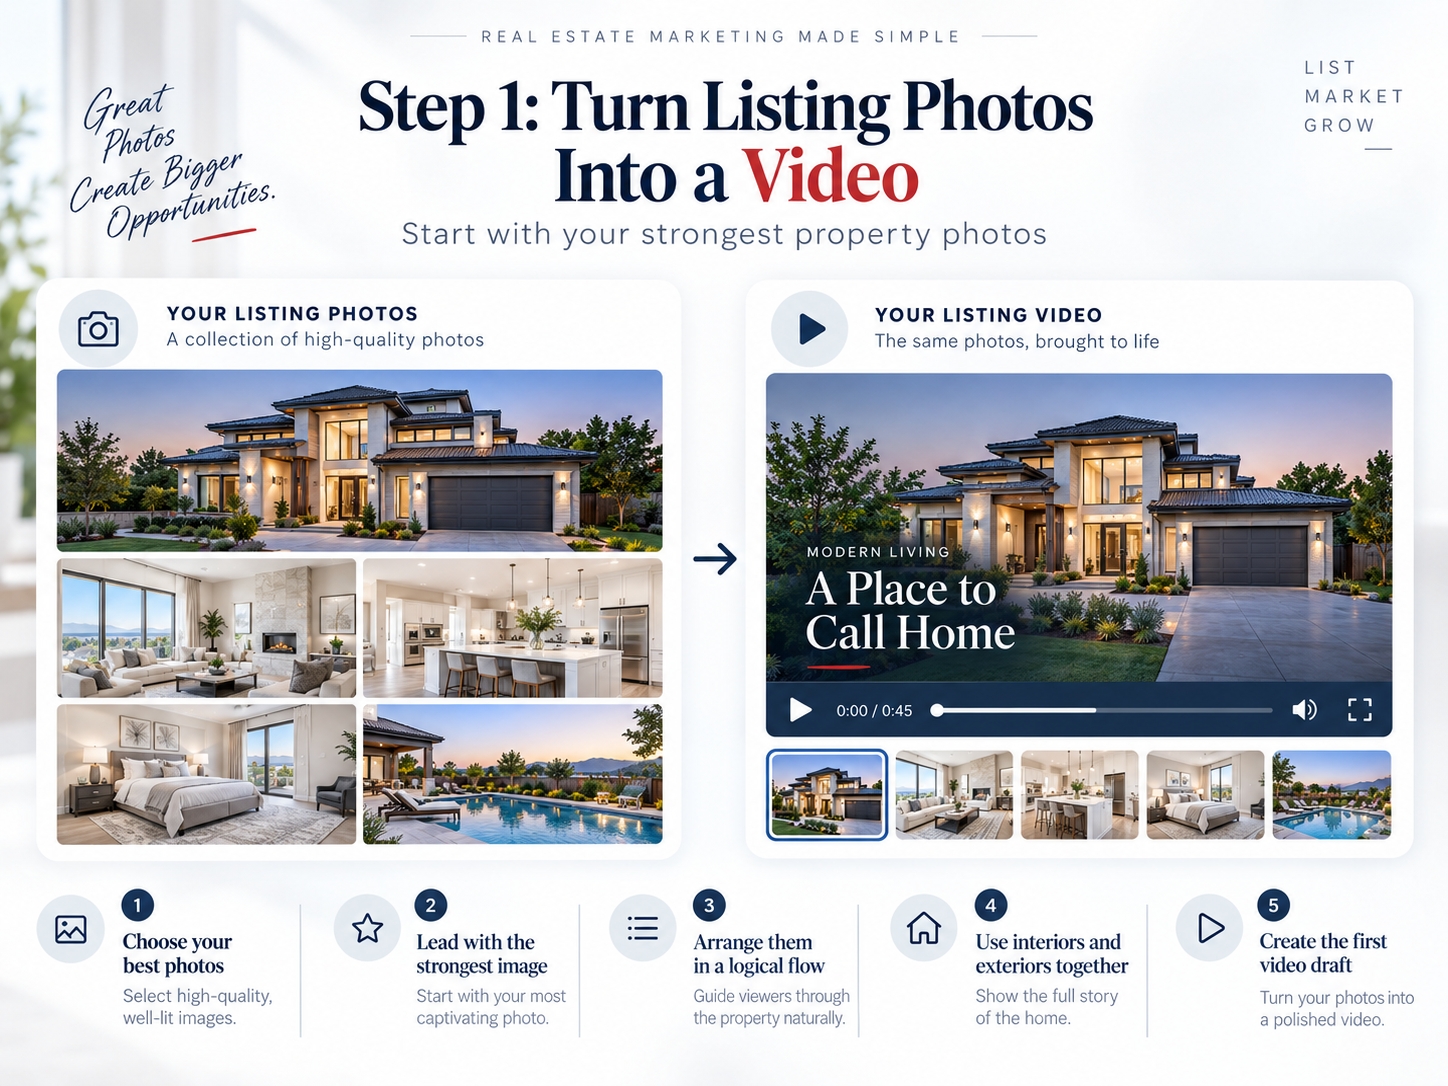
Step 1: Turn Your Listing Photos Into a Video
Start with the Photo 2 Video tool.
The goal of this first stage is to build the visual foundation. Don't worry about narration or agent branding yet. Those come afterward.
Choose the Right Listing Photos
You don't necessarily need every photo from the shoot.
Use the images that tell the clearest story about the property.
A practical sequence might include:
- strongest exterior or hero image
- main living room
- kitchen
- dining area
- primary bedroom
- primary bathroom
- outdoor living space
- pool, view, waterfront, acreage, or another major feature
- one or two details that make the property memorable
The sequence matters.
Avoid thinking only in terms of the order the photographer shot the home.
Instead, think about how a buyer would naturally want to experience it.
Build the First Video
Inside Photo 2 Video:
- upload the listing photos
- choose the appropriate resolution
- complete the order
- add the property details
- arrange the photo sequence
- choose the music
- submit the video for production
- review the completed result
Your first goal is simply a strong listing video.
The narration and branding will be added in the next two stages.
Keep the Video Focused
More photos do not automatically make a better video.
For social media especially, a tighter sequence is often easier to watch.
Ask yourself:
- Does this image tell us something new?
- Is this room important enough to include?
- Are two photographs showing essentially the same thing?
- Does the sequence move naturally through the house?
- Are the strongest selling points getting enough attention?
A concise video gives the property room to breathe without asking the viewer to sit through every image in the gallery.
Review the Listing Video Before Adding Voiceover
Watch the completed video once from beginning to end.
Don't write the narration yet.
Just watch.
Pay attention to:
- which room appears when
- how long major spaces remain on screen
- where the video naturally changes sections
- which selling features deserve narration
- whether the video has a clear beginning, middle, and end
This makes the next step much easier.
Voiceover works best when it complements what the viewer is already seeing.
If the kitchen is on screen, talk about the kitchen.
If the video has already moved outside, don't still be describing the primary bedroom.
That sounds obvious, but it is one of the easiest ways for a narrated property video to feel disconnected.
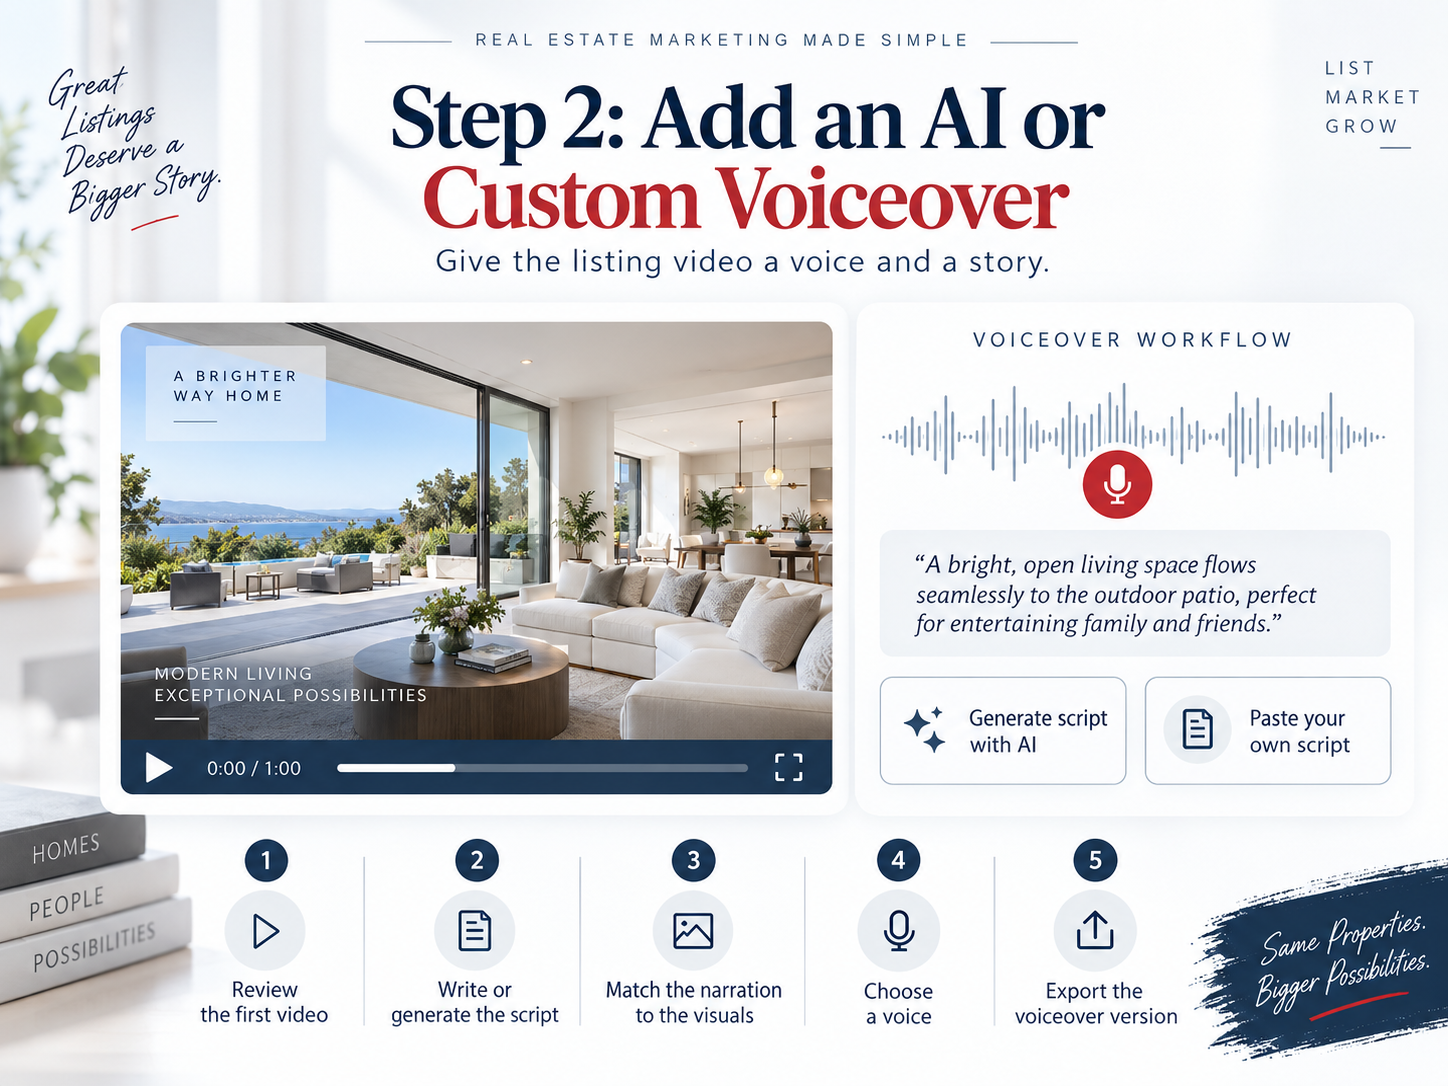
Step 2: Add a Voiceover to the Listing Video
Once the base video is finished, open the AI Voiceover Tool.
Select the property and choose the listing video you just created.
From here, you have two straightforward options:
Option 1: Create the Voiceover Script With AI
If you don't already have narration written, use the AI script option inside the Voiceover Tool.
The tool can create a starting script around the selected property and video.
Then read it before generating the voiceover.
The best AI-assisted workflow is not "generate and publish."
It's:
Generate → Review → Adjust → Narrate
Look for anything that should be changed:
- generic phrases
- exaggerated adjectives
- repeated ideas
- sentences that are too long
- a property feature that deserves more attention
- something mentioned that isn't visually represented
- an opening that takes too long to get to the point
The goal is not to make the script sound like an advertisement.
It should feel more like a knowledgeable real estate professional showing someone the highlights of the property.
Option 2: Add Your Own Script
If you've already written the narration, simply use your own script in the Voiceover Tool.
This can be especially useful when:
- you know the property well
- the seller wants certain features emphasized
- you're marketing a unique location
- the home has an unusual history
- you want your copy to match other campaign materials
- you already have a strong listing description
If you're also working on your property copy, our real estate marketing articles and guides can help you build a more complete campaign around the same listing.
Keep the Voiceover Conversational
Avoid lines like:
"Welcome to this absolutely breathtaking and magnificent masterpiece offering unparalleled luxury."
A more natural line would be:
"This bright three-bedroom home pairs an open main living area with a renovated kitchen and a private backyard built for easy outdoor entertaining."
The second version actually tells the buyer something.
Specific details almost always sound more credible than a pile of adjectives.
Match the Narration to the Visuals
You don't need frame-perfect synchronization.
You do want the major sections of the narration to roughly follow the property.
A simple voiceover structure is:
Opening
Introduce the property or its strongest selling point.
First third
Talk about the main living spaces, overall layout, or kitchen.
Middle
Move into the primary suite, interior features, or important upgrades.
Final third
Highlight outdoor areas, views, amenities, location, or another standout selling point.
Closing
Finish with a concise call to action or agent message.
Do not feel obligated to describe every photograph.
Sometimes the best thing you can do is let the viewer watch the home for a few seconds.
Choose a Voice and Generate the Narration
Once the script is ready:
- preview the available voices
- select the voice that fits the property and presentation
- generate the narration
- review the result
- listen for awkward pronunciation
- check pacing
- revise the script if necessary
- generate the finished voiceover version
The current Voiceover Tool includes multiple voice options, so you can choose a different delivery depending on the property and style of the video.
A luxury listing might call for a more polished delivery.
A casual coastal home might work better with something warmer and more conversational.
The voice shouldn't become the star of the video.
It should help the property story feel more complete.
Why Voiceover Changes the Value of the Video
Music and movement can make a listing visually appealing.
Narration adds information.
That distinction is important.
The voiceover can explain:
- why the layout matters
- what was recently renovated
- how indoor and outdoor spaces connect
- what makes the location useful
- which feature might not be obvious from a photo
- why a particular space is valuable
In other words, the video starts doing some of the work an agent would normally do during a showing.
It moves the content from "look at this house" toward "here is what makes this house worth paying attention to."
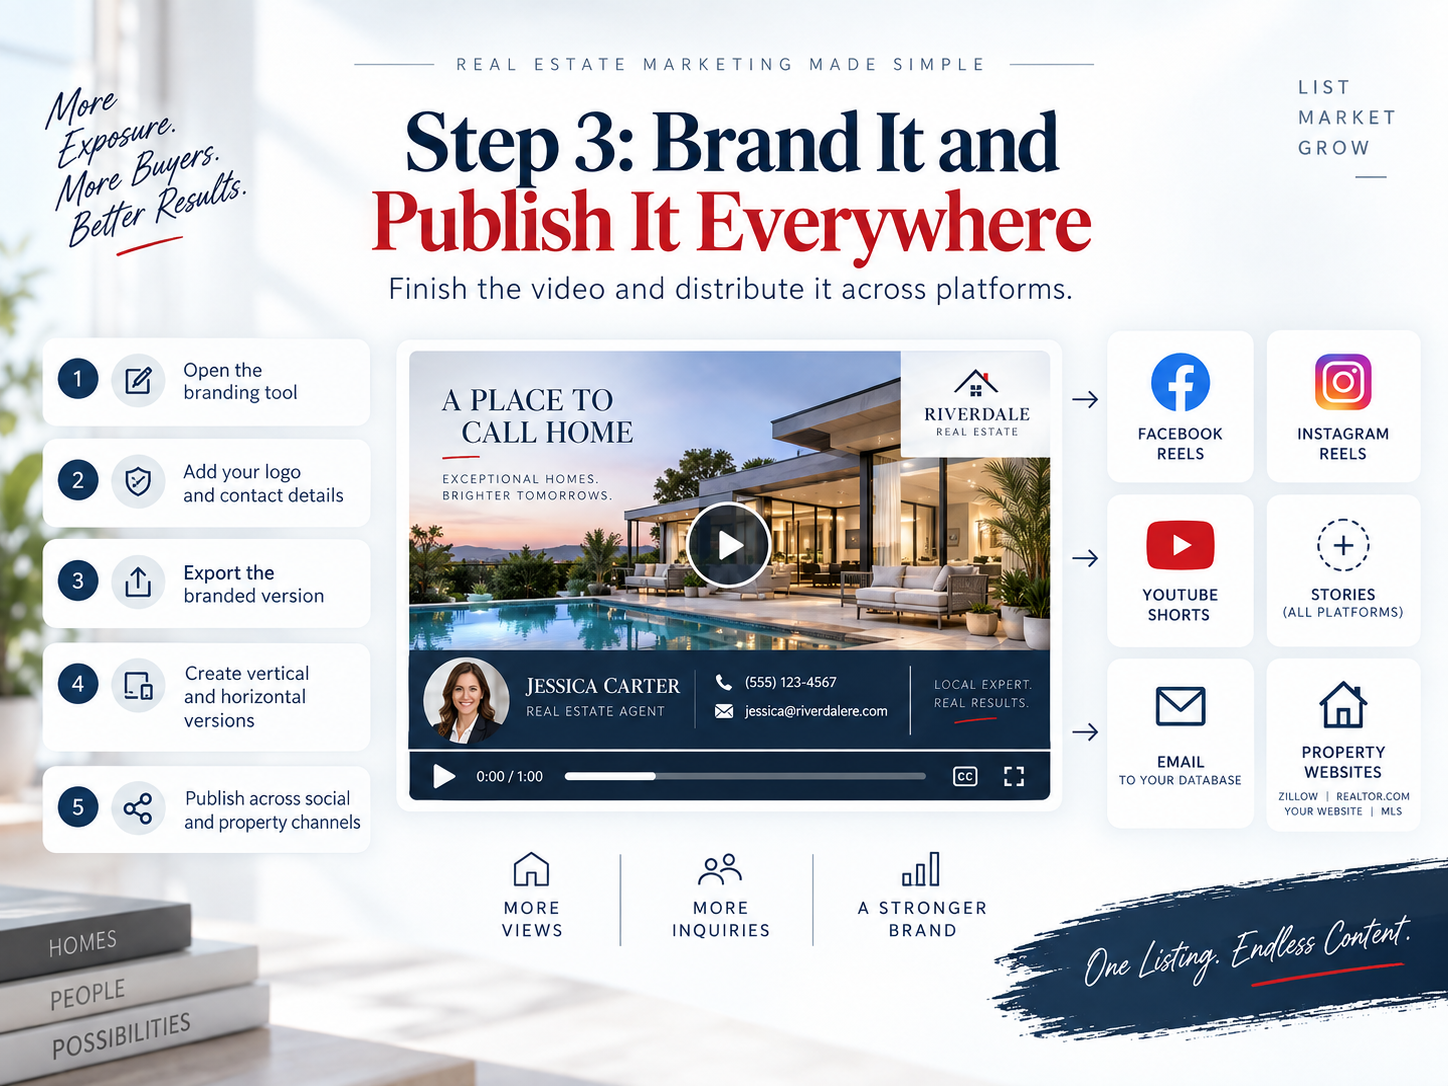
Step 3: Add Your Agent or Brokerage Branding
Once you have the narrated version, open the Video Branding Tool.
This is where the video becomes your marketing asset rather than simply a property video.
Select the voiceover video and apply your branding.
Depending on your saved profile and template, you can work with elements such as:
- agent name
- headshot
- brokerage logo
- brokerage name
- phone number
- website
- company colors
- template style
- other listing information
If you've already saved your branding in Real Estate Photo 2 Video, the tool can reuse that information rather than making you enter the same details for every listing.
Keep the Branding Subtle
The property should still be the hero.
Good video branding answers:
Who is representing this listing?
It should not make the viewer feel like they're watching a giant business card.
Use enough branding to:
- identify the agent
- reinforce the brokerage
- create consistency
- make the content recognizable
- give viewers a way to contact you
Then let the home do the rest.
Export the Branded Video
Once the preview looks right:
- confirm the video
- confirm your agent information
- check the logo and headshot
- review your colors
- preview the final composition
- export the branded MP4
You now have a finished real estate marketing video with:
professional listing photography + motion + narration + agent branding
And everything started with the same photographs that were already being used for the listing.
Step 4: Create a Vertical Version for Reels and Shorts
This is where the workflow becomes particularly useful for social media.
Your standard property video and your social-media video do not always need to use the same aspect ratio.
If you need a vertical version, you can use the Video Remix Tool to adapt your listing-video content for additional formats.
Vertical video gives you access to short-form content surfaces such as:
- Instagram Reels
- Facebook Reels
- YouTube Shorts
- TikTok
- Stories
This matters because these are not simply smaller versions of the normal social feed.
They are dedicated short-form viewing and recommendation environments.
Publishing there gives the listing another distribution opportunity beyond a standard photo post.
That doesn't guarantee a viral video.
It does mean the property now has another way to be discovered.
Why Reels, Shorts and Stories Can Increase Listing Exposure
Consider what happens when you only publish listing photographs.
You might post:
- an MLS gallery
- a Facebook photo post
- an Instagram carousel
Those are useful.
But a vertical video can also enter the platform's short-form video ecosystem.
That creates another potential discovery path.
One listing can now appear through:
Feed content
and
short-form video content
and
Stories
instead of relying on a single post type.
That's the real advantage.
You're not betting everything on one algorithmic placement.
You're giving the same property multiple chances to reach an audience.
For agents trying to grow their own social presence, there's another benefit: video can introduce you and your marketing style to people who were never actively searching for that specific house.
Don't Publish the Exact Same Video Everywhere Without Thinking
Repurposing does not mean blindly uploading one file to seven platforms.
Make small adjustments when necessary.
For example:
Facebook Reels
Use a strong opening and make the first seconds immediately clear.
Instagram Reels
Keep the visual pace tight and make sure important text sits safely inside the vertical frame.
YouTube Shorts
Use a searchable title such as:
Modern 4-Bedroom Home With Pool | Real Estate Tour
rather than something vague like:
Check this out!
Stories
Break the content into shorter sections if appropriate and pair it with:
- open-house information
- a link
- a poll
- a question
- a direct-message prompt
A full or slightly longer branded version may make more sense when the post is about the marketing strategy behind the listing.
Think of the property video as a master asset.
Then make the distribution fit the platform.
Branded and Unbranded Real Estate Videos Serve Different Jobs
A branded video is ideal for your own marketing channels because it connects the listing back to you.
But certain MLS, brokerage, IDX, or local advertising environments may require an unbranded version.
Always follow the requirements that apply to your market.
In practice, having both versions can be useful:
Unbranded video
Useful where agent or brokerage identification is restricted.
Branded video
Useful for:
- social media
- your website
- seller communication
- presentations
- personal marketing
- direct buyer follow-up
The important point is that you don't have to choose one or the other for every use case.
Create the appropriate version for the channel.
How This Workflow Fits Into a Larger Listing Marketing Strategy
The video itself is valuable.
But the bigger idea is repurposing.
The listing photos you started with can also become:
- social graphics
- listing flyers
- property PDFs
- photo carousels
- virtual staging
- single-property content
- additional short-form videos
We break down several of those ideas in our guide to 5 ways to get more from your listing photos.
That is the strategy behind One Listing. Endless Content.
Instead of treating each piece of marketing as a completely separate project, you build a connected content system around the property.
The photography becomes the foundation.
The Complete Listing-Photo-to-Branded-Video Workflow
Here's the entire process in one place.
1. Create the listing video
- Open Photo 2 Video
- Select your strongest property photos
- Put them into a logical visual sequence
- add the property information
- choose your music
- create the listing video
- review the finished result
2. Add the voiceover
- Open the AI Voiceover Tool
- select the property
- choose the listing video
- generate a script with AI or enter your own
- edit the script for accuracy
- choose a voice
- generate the narration
- review the narrated video
- export the voiceover version
3. Add your branding
- Open the Video Branding Tool
- choose the narrated video
- select the branding template
- confirm your headshot and logo
- confirm agent and brokerage information
- adjust branding where needed
- preview the result
- export the branded MP4
4. Adapt it for social media
- use the Video Remix Tool when you need another video format
- create a vertical version for Reels and Shorts
- keep a landscape version where appropriate
- create shorter cuts when useful
5. Distribute it
Publish the appropriate version through:
- YouTube
- TikTok
- Stories
- your website
- email campaigns
- seller updates
- buyer follow-up
One video should not have only one job.
Final Thought: Make the Photos Work Harder
You've already done one of the hardest parts.
You have the photographs.
Instead of letting those images do one job in an MLS gallery, turn them into a larger marketing system.
Start with the Photo 2 Video workflow.
Give the video a story with the AI Voiceover Tool.
Make it your own with the Video Branding Tool.
Then adapt it for additional social formats with Video Remix.
The result is not simply another video.
It's a reusable, branded piece of content that can support the listing across multiple channels while also showing future clients how seriously you take property marketing.
And that is the bigger opportunity:
One Listing. Endless Content.
One Listing. Endless Content.
Turn listing photos into cinematic videos, branded social clips, flyers, property pages, reports, and more.
Create My Listing Video